- Access to Manage accounts, with the right to create accounts.
- Depending on your role, you can create different types of account (learner, instructor, manager…).
Steps
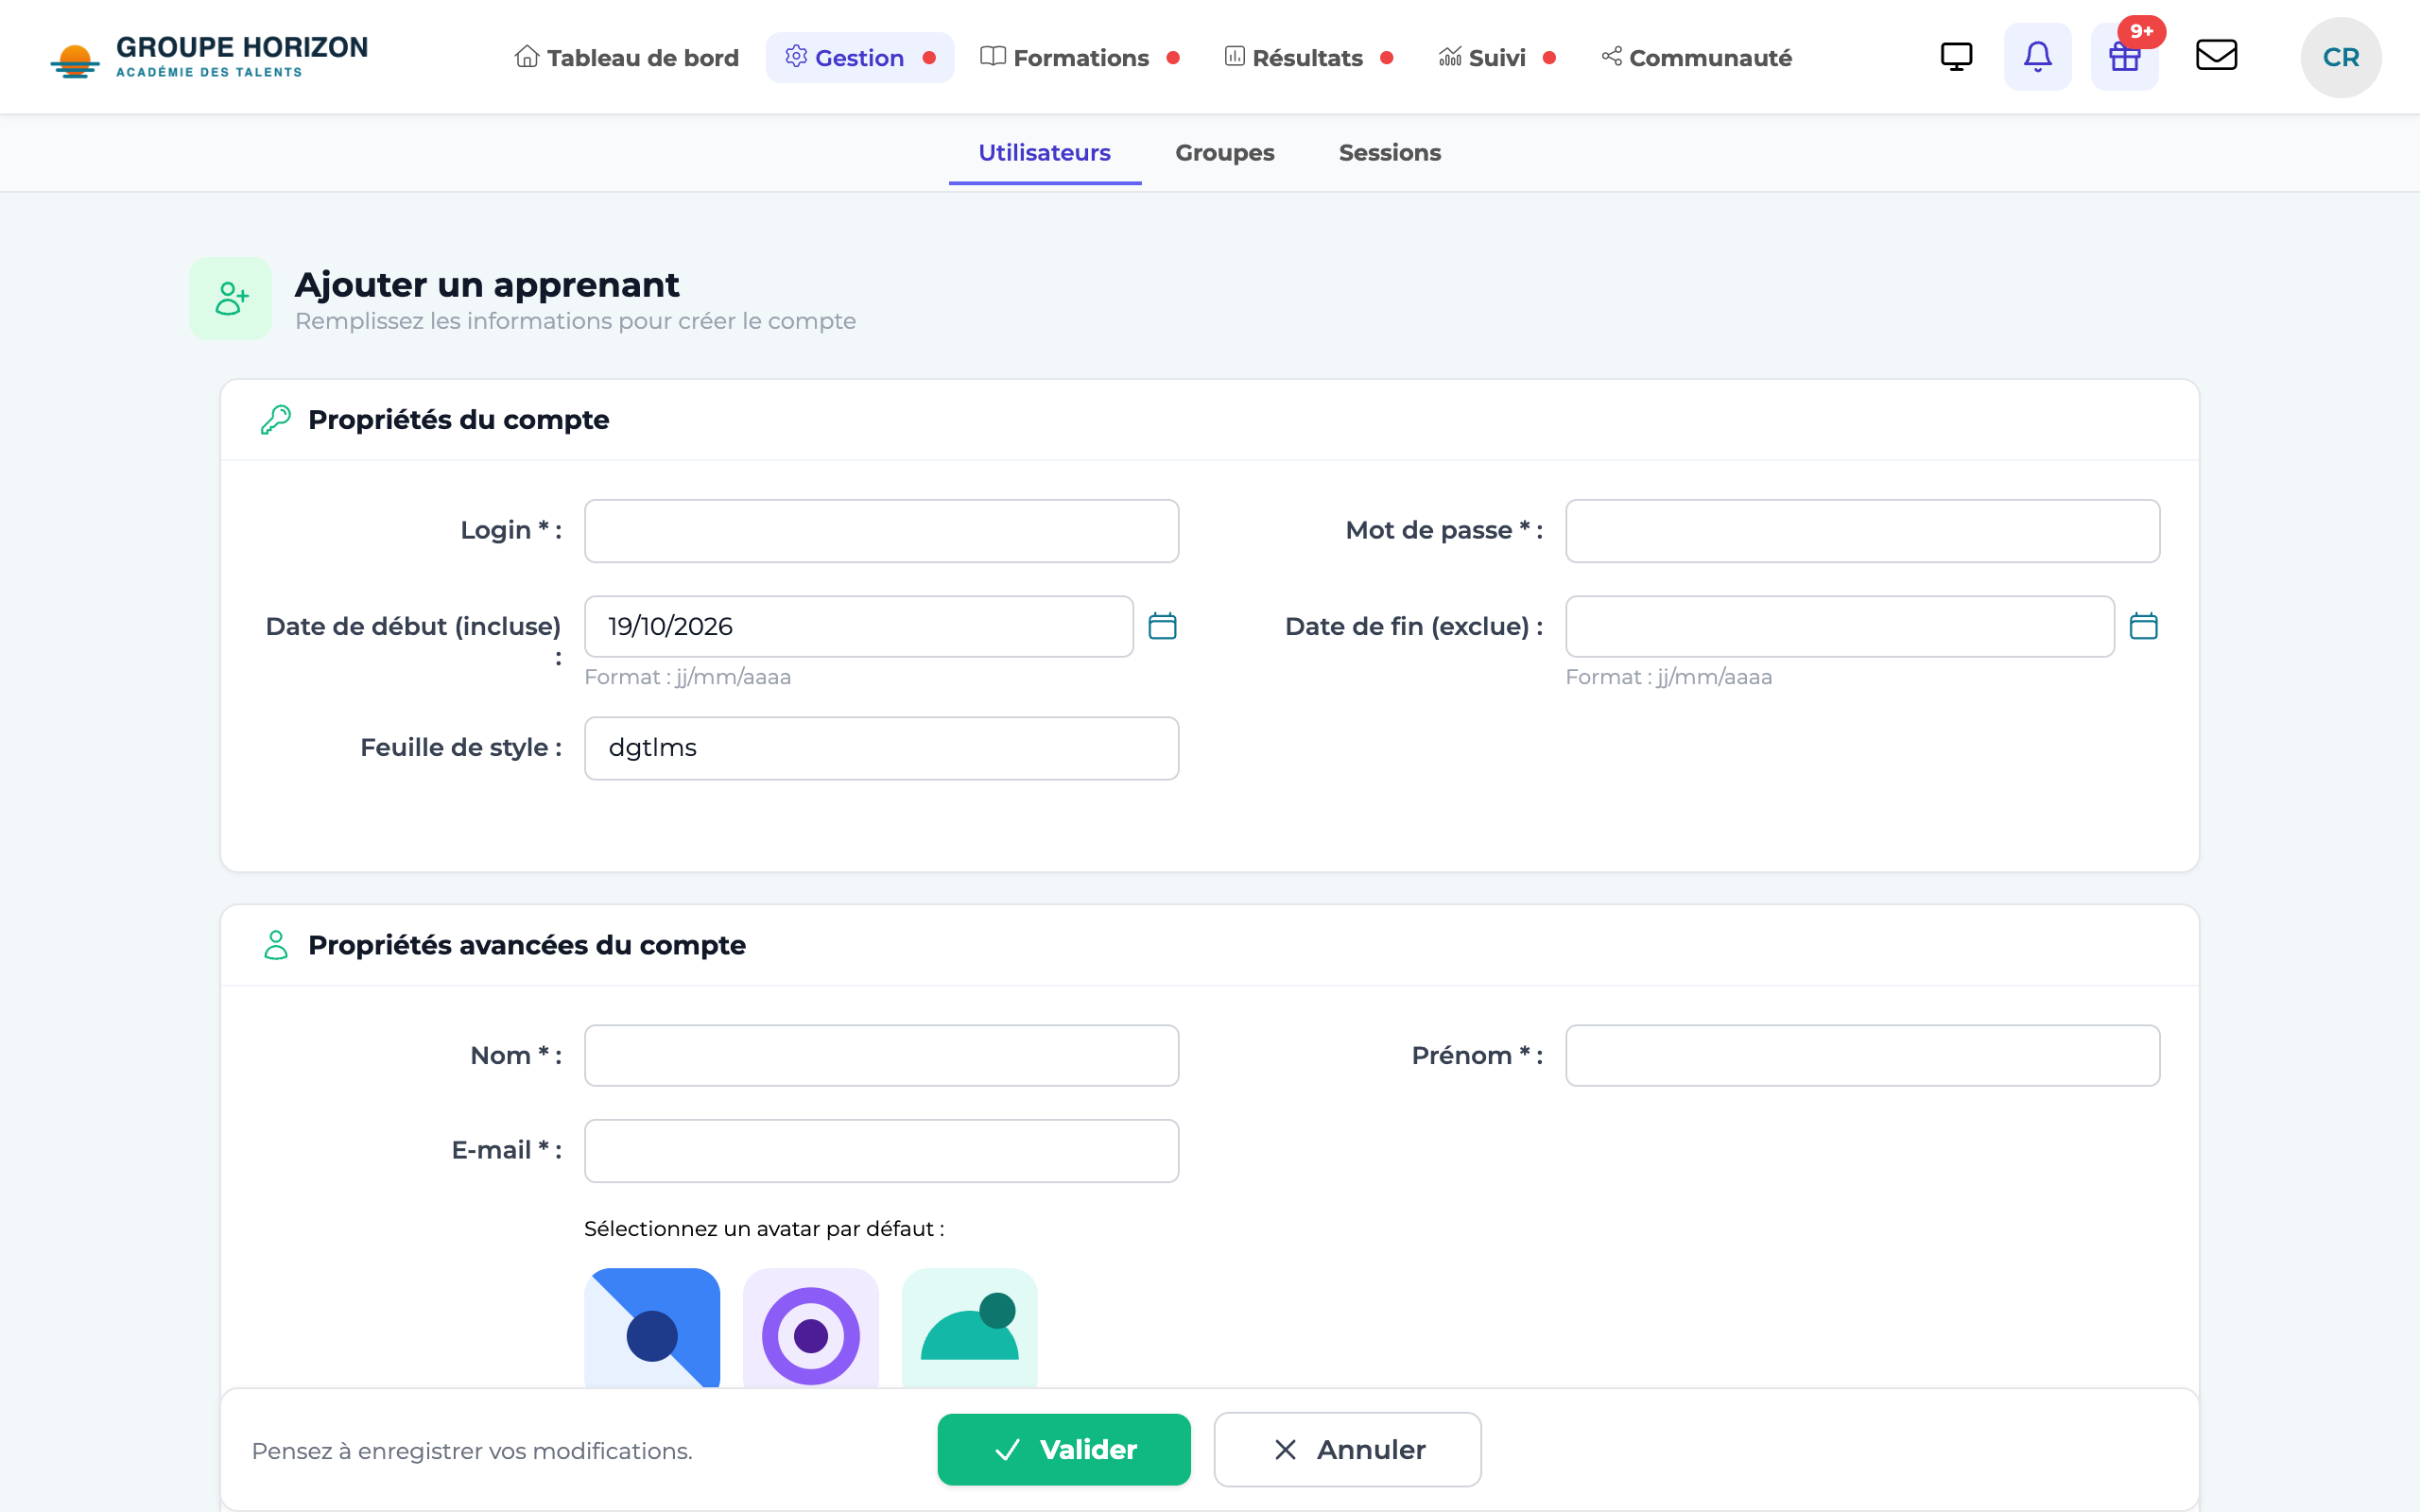
Open account creation
Go to
Manage accounts → Add an account, then choose the type of account to create.Enter the identity
Fill in the last name, first name, email address and username (login). The email address is used for notifications and for sending the login details.
Set the access
Link the account to a session (profile) and, if needed, to one or more groups.
Handle the password
Leave the field empty so that a login details email is sent automatically, or set the password yourself.
Complete any extra fields
Depending on your configuration, custom fields (employee number, department…) may be required.
Save
Confirm: the account is created and appears in the account list.
- To create many accounts at once, use the CSV import instead.
- Creation rights depend on your role: depending on the configuration, an instructor can only create learners, and a site administrator remains limited to their own scope.
- To find an account, type a few letters in Search the table… above the list (learners, instructors, administrators, custom accounts): sorting and filtering happen at once. Beyond 2,000 accounts, the list is split into pages and a Search … in … field replaces it; extra filters (dates, yes/no) set by the administrator stay visible.